Piano care, cleaning, polishing & maintenance: tips to ensure your piano keyboard works smoothly! Fixes to the most common problems that piano & keyboard owner’s face. To ensure that your piano-keyboard stays in shape and gives you consistent performance for a long time, you need to take care of it. It does not matter if you have a digital piano, acoustic piano or an electronic keyboard; you will need to put in effort not only to learn to play it but also to take care of it.
Digital Piano Keyboard – Key Repair & Common Problems
Before we move onto the piano care part, let us have a look at some of the most common problems that digital keyboard and piano owners face.
The most common digital keyboard repairs needed:
- Broken keys or sticky keys
- Keyboard does not switch on
- LCD Broken or does not light up
So what is the solution? I am afraid but the only recommended solution is to get it repaired by the nearest authorized service facility, or take it to your nearest musical instrument shop and ask them to get it done by a qualified and reputable professional.
Digital Keyboards & pianos are complex instruments and trying to fix things on your own can only lead to additional problems.
You may try to do it yourself by going through some of the suggestions mentioned below by visitors here on this site, but that should only be the last resort… as some countries may not have easy access to qualified servicing professionals.
And that too, if you are a person who has the aptitude to open and fix things!

Tips On Piano Care, Cleaning
To begin with, you will need to find a good place for it to rest! You will need to make sure nothing falls on it or nobody trips over it and there are no major temperature fluctuations around your instrument.
Once that is done, you will need to regularly clean the body as well as the keys of your instrument. Dust and dirt need to be kept away from your keyboard as far as possible to keep it problem-free for a long time.
Polishing & Dusting Tips
Remember, cleaning and polishing (keep it to a bare minimum) are two different actions that is performed on pianos.
Best is to use a a feather duster to remove the dust, dry cloth should be avoided for dusting as it can cause the dust to scratch the finish (need to be careful if you have an expensive piano).
You may polish your piano to make it look new, and give it a shiny look. However, you have to first find out whether your piano has a polymer or lacquer finish, as these two finishes must be polished differently (else you may cause irreversible damage to the piano).
- When dusting with a cloth, use a soft fabric such as flannel or chamois (avoid rags or paper towels)
- You may use a slightly damp Cloth, but dry immediately with a separate cloth.
- Dusting/cleaning any exposed areas of the piano’s interior should ideally be left to professionals, as those are fragile
How to Polish Lacquer or Polymer Piano Finishes the Right Way
Though its important to polish a piano to make it look young and new, you need to do it correctly so that you don’t cause any damage to the finish and/or even the instrument.
Most pianos have either Lacquer or Polyester Piano Finishes, and each of them have to be treated differently. So before you think of polishing your piano, find out whether it has a polymer or lacquer finish.
But how to distinguish between these two finishes? Here’s an easy way to do it.
Lacquer
Lacquer is most common on North American made pianos. It looks similar to wooden furniture, the surface seems scratchable, and you can also see the wood grain under the finish.
Problems with Laquer: Waxy buildup, softening of the varnish, Lacquer may also dry quickly depending on the local weather.
Get a good product to polish your lacquered piano. Avoid common household furniture polishes and do not use products meant for polymer piano finishes.
Polymer (or Polyester)
Polyester finishes are hard, its difficult to see the wood grain, are usually dark and reflective, and very easy to leave fingerprints.
Problems with Polymer: Holds well against spills, scratches, and dents. However, the surface can easily highlight minor flaws. Improper cleaning can also leave hairline scratches on the piano surface.
Avoid high-gloss products to polish polymer finish as it can easily highlight scratches and other unseen flaws. These finishes can actually be cleaned with simple dusting, but Steinway also makes polishes for this type of finish.
Its important to know your piano’s finish before you polish it. And don’t forget to keep the wood polish off the keyboard.
Also Read:
How to Clean Piano Keys
Cleaning your piano keys regularly is a must if you want your piano to perform normally. If not cleaned for long, dust will creep in through the openings between the keys and over a period of time could cause certain or all keys to stop working.
To clean the keys, use a lightly damp cloth or a feather duster for cleaning. To go to every nook and corner, use a paintbrush to clean the keys.

You can start with the white keys first and clean the black keys last, or you can even proceed in a chromatic sequence of keys.
It is better to clean a few keys, may be one octave at a time, and dry them immediately before moving onto the next set of keys.
Also Read: How to Remove or Disassemble Keys / Keybed from the Piano?
Be careful with what cloth you use to wipe the piano keys. Colored moistened cloths can give out color which can easily get transferred onto the white keys causing discoloration. You can even use Micro-Fiber Polish Cloth for better results. These have soft cotton like feel, combined with the cleaning power of a micro-fiber.
Get into the habit of cleaning your piano keys on a regular basis and they will continue to perform well for a long time.

Here are some good practices to follow when cleaning your piano, to make sure the piano looks its best all the time.
- Use Cleaning & Repair Toolkit
A tiny vacuum attachment set works great for cleaning from difficult corners and has a multitude of other uses. This and a repairing tool kit will always come in handy so it is best to have one at your disposal. You may may also need a carpet (rug) under your piano.
- Effect of Moisture
Excessive moisture affects your pianos performance in the long run. It is a known fact that high levels of humidity cause wood to swell, which in turn affects the performance of your acoustic piano. A humidity monitor will help you keep an eye on the humidity in your room and to decide if you need a dehumidifier. The wear and tear of the wooden parts could mean more maintenance work in the future for your piano.
- Keep Away from Liquid/Food
Do not spill any liquid on your Electronic Keyboard! It may permanently damage your instrument. So make sure, no food and drink near your keyboard.And if you want your pet to stay away from your piano practice area, then using a Pet Deterrent will definitely help. These are safe and much humane method of keeping pets away from your piano.Also Read: Electronics Accidental Protection Plan - Avoid Hot and Cold
Avoid exposing your instrument to extreme cold or hot conditions. Keep it away from direct sunlight and other sources of heat/cold air. Make sure the room has good ventilation. The electronic keyboards need to cool down after a long practice session. - Keep in a Safe Place
Make sure your keep your expensive keyboard at an appropriate spot. Make sure there is not any heavy object directly above it which may give way any time. Also make sure that nobody trips over the connecting wires of the adapter. Pianos should not be near a fireplace, vent or in locations that have a draft. - Electricity
When not in use, disconnect the keyboard instrument. Do not keep the adapters powered on; this wastes electricity. Use the correct power supply for your instrument. Use the adapter as mentioned in the manual. Using a different adapter will shorten the working life of the instrument. - Regular Cleaning
Piano cleaning on a regular basis, at least once a month, is essential to maintain its appearance and to avoid dust and dirt build up.When cleaning the body of your piano, do not use household cleaning products without asking your dealer – It could ruin your piano’s finish. A quality furniture cleaning and polishing product can be used for all wood finishes.You can use a mildly dampened cloth to wipe the body of your piano; just make sure you wipe off excessive moisture using a dry cloth. Cleaning cloths for musical instruments.To clean the keys, use a damp cloth or a feather duster for cleaning. For better results Micro-Fiber Polish Cloth, that have soft cotton like feel and the cleaning power of a micro-fiber, can be used.To go to every nook and corner, use a micro vacuum attachment set to clean the keys. Just make sure that you use the correct nozzle. You do not want to push all the dust inside the instrument.
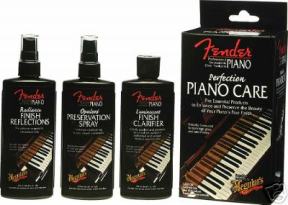
Piano Polish: For pianos with a high-gloss finish, maintaining a dust-free appearance is important. Piano Polishes leaves the finish of your piano with a clean, clear sheen, repels dust, and keeps it looking like new.
- Tuning
If you have an acoustic piano, you will need to get it tuned regularly, say once in about 6 months.If you are moving to a new house, get it tuned after you move as the piano is very likely to go “out of tune” while moving.If at all you decide to have a go at tuning the piano yourself, then tools such as a chromatic tuner and a contact microphone will help you get started.An excellent book to have is Piano Servicing, Tuning, and Rebuilding: For the Professional, the Student, and the Hobbyist, if you want to learn more on this topic.
More Piano Cleaning Tips
- Avoid placing objects on your piano to prevent any marks on the finish.
- If you use a piano lamp, make sure it has a cloth or felt base, or place it on top of a cloth or soft piece of fabric.
- Never spray products directly onto the piano. Spray the polish onto your cloth
- Stand away from the piano when using spray to prevent the particles from landing on your keys, strings, or other fragile areas.
For cleaning and polishing the wooden exterior of your piano, you may use Steinway Furniture Care Cleanse and Condition, which is suitable for all wood finishes. As far as possible avoid chemicals bought from stores as it could cause grainy textures or discoloration. Plain water with mild soap and vinegar can be used for cleaning purposes.
Final Thoughts
Piano cleaning on a regular basis is essential to maintain its appearance and to avoid dust and dirt build up. To maintain the looks of your piano, you have to clean it on a regular basis. Depending on how dusty the place where you live, you may even have to clean it daily, or at least once in a few days. Avoid household furniture polishes or cleaning products – it can ruin your piano’s finish, and affect the strings, tuning pins and action parts. You may use a cloth to clean the piano (or use a proper Piano polish instead.)
Useful Links
You can read more on care and maintenance of musical instruments here.
Find useful accessories for piano and keyboards. You can also go through this detailed guide on keyboard instruments.
Related: Caring for your Steinway, the ABC of proper care.
KeytarHQ editorial team includes musicians who write and review products for pianists, keyboardists, guitarists & other musicians. KeytarHQ is the best online resource for information on keyboards, pianos, synths, keytars, guitars and music gear for musicians of all abilities, ages and interests.


How to fix dead notes on a Yamaha Clavinova CLP 840 (vintage 1999) Digital Piano.
I disassembled the keyboard, which was pretty dirty. Pretty obvious that the debris prevented the contact triggered by the hammers hitting the silicon rubber contacters and the electronic board. I have 2 questions to someone who cleaned his Clavinova about the operation:
1. I noticed clear odorless oil between the silicon rubber pad and the electronic circuit. To clean the keyboard, I had to wipe it all out with isopropyl alcohol.
A. Is the presence of this oil normal? (I am not the first owner).
B. What is the oil I should use to relube the pad: Yamaha product number, price and description please.
Any other equivalent?
2. I noticed after attempting to put back the rectangle silicone keyboard in place that it is of a bigger dimension than its housing (about an extra centimeter on the length. It can’t be put back in place like this. Is it the normal dimension of this rubber pad, or if with time it elongated. I doubt that it elongated with time as usually silicone rubber is very stable.
A. Please, could someone with experience confirm that the extra length of this pad versus the housing is normal.
I have included a picture of the keyboard assembly. You see the green part with the 2 black (graphite) horizontal lines is the silicon rubber part of the circuit, the hammers hit the back of it. The electronic circuit has been removed and can be seen sitting on the mid part of the keyboard. The rubber knobs of the silicon pad close the circuit on the card when each key is hit. Thank you for the info. – Francesco (Canada)