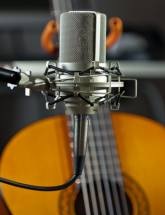
Here are useful Guitar Recording Tips, Tricks & Techniques…
When it comes to recording, not everybody likes to stay confined only to the software space, even though you can get some high quality instrument sounds (VSTs).
There are many who can play a musical instrument and would love to use the sounds of the instrument in their recordings, and because the guitar is such a popular musical instrument, we’ll cover some cool tricks on how to record a live guitar performance (be it solo or rhythm).
It Starts at the Source
Yes, capture the sounds rightly at the source, and you can expect a good quality recording.
- Make sure your guitar is in tune and intonated.
- Check your guitar’s tuning between takes.
- Make sure you use a good quality cable to get a better sound. A bad cable can make even the best guitar sound lousy.
If you have a tube amp, you can expect some dash of realism to your recordings. Just plug your guitar in it, turn it up and stick a mic in front of it. There’s no problem with virtual amps as well, it’s just that some tube amps sound really great.
Getting that Huge Sound
If you are new to recording, what you probably don’t know is that the loud sound that you hear in the recordings is because of layering (doubling) of tracks.
So rather than cranking up the distortion or preamp level, you should get it down (about 25% below normal) and turn up the master volume. It’s better to start with a cleaner sound and layer your tracks; this will produce a bigger sound that will easily cut through the mix.
Basically, if you recorded the rhythm guitar part twice, you have two tracks to work with. If you also used a condenser mic to capture some room sound, you would have four tracks to work with.
More About Miking
Here are a few suggestions when miking the amp.
For rhythm guitar, you can use a hure SM57 placed in front of one speaker, about an inch from the grille. A good starting point is between the centre of the cone and the outer edge of the speaker. Moving the mic from side to side even a little changes the sound dramatically so you can even test what sounds good to you.
If you have someone to help you, have them move the mic whilst you play and listen through the headphones. If not you’ll have to play around a little.
When you’ve found the sound you like, you can start laying down the tracks.
- Get your first track perfectly, then record another track playing exactly what you played on the first.
- You can move the mic slightly for the second track or perhaps use a different guitar (for variety).
- If you want to capture some of the room sound you can also set up a large diaphragm condenser mic about three feet away from the amp.
It’s important that you Record each mic to its own track.
You don’t need to compress when tracking, just make sure your mic input levels aren’t clipping.
You Need to Edit
It’s an important step to clean and get rid of unwanted noise. And it’s better if you get into the habit of editing your tracks right away.
Even if you can’t hear the noise (because other tracks are playing), if it’s there it adds up.
And it does make for a muddier mix, so watch out for those right from the beginning.
Using Panning for Better Results
Here’s how this effect is commonly used:
- There are many who like to pan their close-miked rhythm guitars hard-left and hard-right. But, this can leave a little too much space in the middle, so if you have those two condenser tracks you can pan them around <30 30>.
- If you just have the two close-miked tracks you can fill up the space using some subtle effects.
Using Compression for Punch

A lot of guitar players don’t compress their rhythm guitar tracks, but I think it shapes a track nicely. However, remember not to overdo it.
- Now, the amount of compression that you need to use also depends on the type of song and the style of playing, so feel free to experiment.
- Uptempo, chunky rhythms require faster attack and release times.
- Slow, sustained chords sound great with slower attack and release times.
Using Time-Based Effects
To give your guitars depth and space, recording engineers use time-based effects such as chorus, reverb and delay.
Here’s how some of these effects are applied:
- A fast reverb with a slight pre-delay gives an impression of spaciousness. Try applying it to each rhythm track and panning it in the opposite direction.
- Don’t make it too “wet” or it’ll start to lose some of its edge.
- Use a touch of slow chorus to fatten it up and to make it sound good.
How to Use Equalization
One of the most important things to keep in mind when recording guitar is how it will fit in the mix. For a balanced mix, each element must occupy its own space.
Here’s what most musicians do:
A big part of a rhythm guitar’s power actually comes from the bass guitar. Since the fundamental frequency of bass falls between 40 Hz and 80 Hz, it makes sense to “get out of the way” and cut those low frequencies on a guitar track.
Most musicians usually cut below 100 Hz. You can boost a bit between 2-3 kHz for crunch, and also up between 6-8 kHz for a bit more “air”. This is where you can vary the tracks. If you boost one track at 2 kHz, boost the other at 3 kHz.
If you give each track a different tonal character, your guitars will sound bigger overall.
Tips for Recording Lead Guitar
There are many who treat their guitar leads just like a lead vocal. It has to stand apart from the other guitars, like a lead vocal stands apart from the other vocal parts.
Usually, lead guitar should have it’s own voice and space.
However, it’s perfectly okay if you don’t want a melodic lead guitar (knowing how to do it helps though).
Here are some suggestions:

- Strive to make each guitar part sound different. If you have four or five guitar tracks and all with the same sonic qualities, it won’t sound good.
- It’s a good idea to use a different guitar and amp for leads than the ones you used for rhythm guitar (if you can). If you must use the same gear, try using a different pickup and/or amp settings.
- Even if you keep everything else the same, you can get vastly different sounds with microphone choice and placement. So go ahead and move the mic around!
Miking
Whenever you record lead guitar, try using a different microphone (if you can) than what you used for recording the rhythm part.
For rhythm you could use a closely placed Shure SM57; For leads, you may use a condenser mic, and place it about three feet away from the amp.
However, if you don’t have a condenser, or if you only have one mic that’s okay too.
Moving a microphone even an inch from side to side, or back to front will change the sound drastically. Try different mics (if you have them), and experiment with different mic placements. This will give you so much more to work with during the final mixdown.
In the Mix
Many prefer to treat their lead guitar tracks similar to lead vocals, so the processing would also be more or less similar.
- The volume would be around the same as the vocals
- Using compression will smooth out the track and make it more fluid. A medium attack and very slow release on a slow, melodic lead can give it an ethereal quality (hard to describe i guess).
- Fatten it up a bit with a touch of stereo chorus, add a little reverb and some delay.
- Maybe pan it slightly off-centre.
You have to get more creative here.
Recording Acoustic Guitar
Recording acoustic guitar and making it sound professional can be a daunting task, but with a little planning and careful attention to detail it is possible to achieve excellent results.
Strings & Picks
This is something that you probably know as well (as an experienced guitar player). Just remember to check your tuning regularly between takes.
- Make sure your guitar is in tune and stays in tune
- Make sure your strings are reasonably fresh, no discernible rattles and buzzes coming from the guitar.
- Choose the gauge of the strings based on what sound you are after.
- Heavier gauge produces a thicker sound but could be a little too tubby to cut through a rock mix; however it might just be right for a sparse guitar/vocal arrangement. A lighter gauge string, on the other hand, will have more cut but may sound too thin.
- If you play with a pick, try experimenting with different pick thicknesses.
Avoid Unwanted Noises
This is something that you can easily control.
- Use a comfortable stool, something that doesn’t creak when you shift your weight. Try sitting in the middle of the room.
- Belt buckles, rivets on your jeans, bracelets, watches, rings (and other clothing or accessories that you wear), all have the potential to tap against your instrument and ruin a good take. Remember, a good condenser mic will pick up any unwanted noise, and if it’s a sparse recording, you’ll hear everything.
About the Room
We have covered a lot about the “studio room” in various other articles, and to reiterate, acoustic instruments usually thrive in a live-sounding room.
Here are some considerations:
- If your room is dead due to wall-to-wall carpeting and soft furniture, try placing a sheet of plywood or hardwood on the floor (at least directly beneath the guitar).
- If the room is too empty, the resulting sound can be too bright. If this is the case, consider draping some blankets around to minimize the standing/reflecting waves.
Which Mic to Choose?
Generally, recording engineers prefer using the condenser microphone, when recording acoustic guitars.
Many people prefer the sound of a small diaphragm condenser, also known as a pencil condenser, on acoustic instruments. Large ones also work well, but the pencil type seems to be the mic of choice due to its ultra-responsive, smaller, lighter-mass diaphragm.
Mic Placement
Here are some common microphone placements for recording acoustic guitar:
When using one mic, a good starting point is aiming a small diaphragm condenser at the place where the neck joins the body, at a distance of around 6 to 12 inches.
Here are some more considerations:
- Moving the mic towards the sound hole will produce a warmer & fuller sound
- Moving it towards the fretboard will produce a thinner sound
- Placing the mic directly in front of the sound hole produces a boomy sound (usually avoided).
- For a fuller sound without the boominess, try placing the mic above the sound hole, looking down at it.
When using more than one mic (Stereo Miking) there are several options you can try, provided you have the required gear:
- The XY Pattern (also known as Coincident Pair) involves placing two small diaphragm condensers at 90 degrees to each other with one mic’s capsule directly above the other. This setup virtually eliminates any of the phase problems typically encountered when using two mics to record a single sound source.Positioning them roughly at the 12th fret with one mic pointed toward the fretboard and the other mic pointed toward the sound hole will give you a nice balance between the high and low frequencies of the guitar.
Here are some more placement patterns:

- The Near-Coincident Pair calls for two directional mics angled around 110 degrees with capsules 6-7 inches apart.
- The Spaced Pair technique places two directional mics 3 or more feet apart, pointing toward the guitar.
- The Mid-Side Technique is an interesting one. It requires a unidirectional mic such as a pencil condenser pointed at the sound source, and a bi-directional mic beneath it and turned sideways so that it picks up reflections from the sides of the room.
Each mic is recorded to its own track, then the bi-directional track is copied to a new track and the phase is inverted on the copy. The bi-directional tracks are panned hard left and hard right, and the unidirectional track is panned to the center. By adjusting the volume of the center track you can control the width of the stereo image.
The Final Mixdown
Here are some ideas that you can implement:
- In general, avoid adding lot of effects
- In a busy rock mix, you can make the sound sparkle by bringing down a little of the low end and give it a boost around 15kHz
- If you’ve recorded in stereo (which you should ideally do), keep the stereo width somewhat narrow. In a sparse mix, you may probably go for a nice wide stereo spread.
- If you’ve recorded in mono, a fast stereo delay can generate some width, say 15ms on the left and 30ms on the right (works nicely on vocals as well).
- Gentle compression will provide a bit more sustain
- Small amount of ambient reverb always helps to glue things together
What you choose to apply when recording acoustic guitar, will vary from person to person. However, the fact is that with some experimentation, and an ear for detail, you can produce some stellar tracks!
To Conclude
The recording tips provided here are more of guidelines, feel free to experiment and have fun with your recordings. There are no hard-and-fast rules to be followed. You shouldn’t forget that recording music is more of an art form. So experiment with different mics/placements. If something sounds good to you and suits your song, feel free to implement it.
KeytarHQ editorial team includes musicians who write and review products for pianists, keyboardists, guitarists & other musicians. KeytarHQ is the best online resource for information on keyboards, pianos, synths, keytars, guitars and music gear for musicians of all abilities, ages and interests.


Leave a Reply