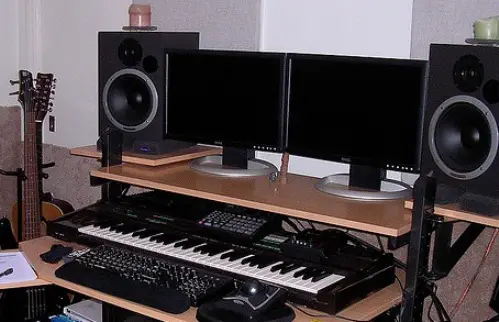
Here’s a complete guide on recording equipment and how to setup a recording studio at home with minimal cost. Thanks to improvements in technology and availability of modern music studio software, recording excellent sounding songs is not difficult and can be done right from your home.
Easy to Setup a Home Studio
Technology is great nowadays. You can accomplish a lot with your computer, something that used to be possible only in a big studio, years back. With experience and the right gear, you can achieve commercial sounding recordings (almost) using a home recording studio setup.
There are many reasons why someone would want to setup their own home recording studio – to produce music (for self or for others), for teaching, to create minus-one tracks for live performances, and more.
It is now easy and affordable to set up a small computer-based home studio that you can use to create great recordings at home.
You can always buy additional equipment as you gain more experience, but otherwise, a basic setup is good enough to get started with music production, and with practice, you can create great-sounding music even with minimum equipment.
In recent years, technology has become much more advanced, powerful and at the same time more accessible and affordable. Music software, in particular, has become far more advanced much to the liking of most Music Producers.
- A Computer is much more powerful and affordable today
- The tools required for making music on computer (and even the stand-alone ones) have become affordable so that even amateurs can achieve professional results (with the correct know-how, which requires lots of practice).
- Technology is making it possible to incorporate newer production techniques, as well as making it easier to promote & distribute your music.
Equipment Needed to Build a Recording Studio
If you intend to set up a home recording studio, here are some of the main “tools” you’ll need.
You might already be knowing about some of these things, and probably owning it too – such as mics, software, computer, etc, that goes in the making of a studio, but there are a few more equipment such as preamps, headphones, monitors, interfaces and so on, that are also required.
Each of these can vary a lot in prices, depending on the quality and the intended target audience. But it is indeed possible and relatively easy to make a great sounding recording studio on a low budget.
Depending on what you are going to record, you may only need a computer, recording software, and an audio source such as a microphone. You don’t need a mixer right away, but good monitors and a good acoustic space are important, they need not be too expensive though.
If you are not going to record vocals and guitars, then you may not even need the microphone to begin with. You can always take your tracks to a studio and record the vocals, as well as get those track mixed by the sound engineer working in the studio.
Anything more than that would just be a luxury, especially if you are just a beginner! It is recommended that you grow your home music studio as and when you grow in knowledge.
There are times when it does make sense to get your music recorded by professionals, but if you’ve just started composing your own songs, and intend to do it for some time, it definitely makes sense to build your own music recording studio at home.
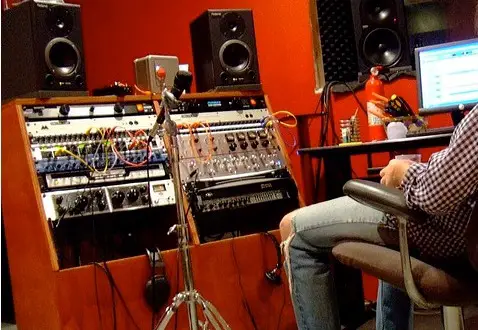
Here’s what you can start with; a basic setup! You may choose as per your specific requirements.
Computer
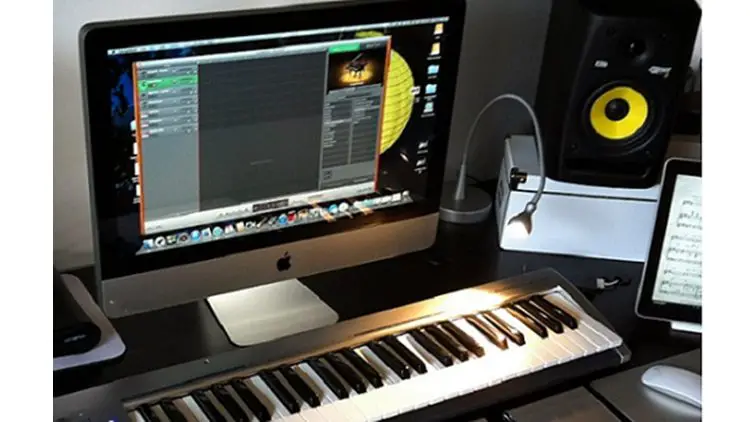 The first thing that you need in any computer based studio is a powerful computer to run all the software. Without going into the debate of computer vs Mac, it is best to have a computer that is built specifically for music. There are many who use Mac but a PC should work fine as well.
You may use a laptop or a desktop but whatever you use, just make sure that is built to a very high spec, and if you can, keep the computer reserved only for music and for no other activities.
Software
 You will need a good recording software / sequencer such as Sonar, Cubase, Reason, or Logic. There are many more but these are some of the popular ones. Besides, sequencing abilities most of these also come with editing features, a mixer, effects such as compressors, limiter, equalizer, and so on.
However besides the recording software, you will also need lots of sounds to be able to make music. These are known as software libraries and plug-ins.
Keyboard Controller
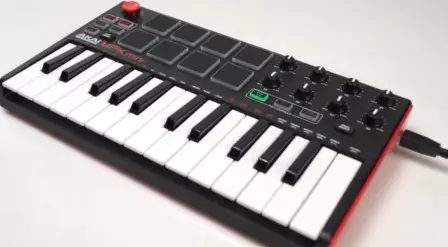
If you have a really tight budget, then you can skip this. A keyboard controller is basically used to control the various sounds, and also key in the notes. If you are an absolute beginner who is just exploring how things work, you may directly input the notes in the sequencer by using the mouse of the computer if you wish. You can always buy the midi controller later on when you have the budget.
Audio Interface
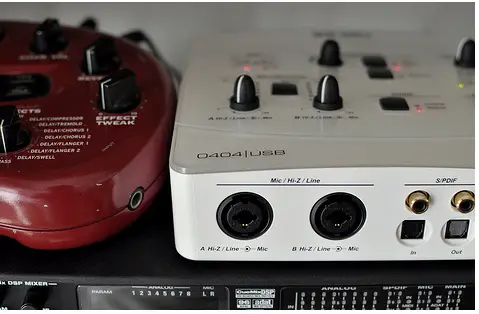 You need this piece of equipment to get the sounds in and out of your computer. In order to get the sound from your microphone, an electric guitar, or keyboard into your computer, you need a good audio interface. Every computer does have a built-in sound card for audio purposes those are not designed for music production. It is best to invest a decent audio interface as these have high quality “Analog to Digital” and “Digital to Analog” converters built-in to get the best possible sound quality. Having a good audio interface is the key to a great sound quality for everything in your studio.
Microphone
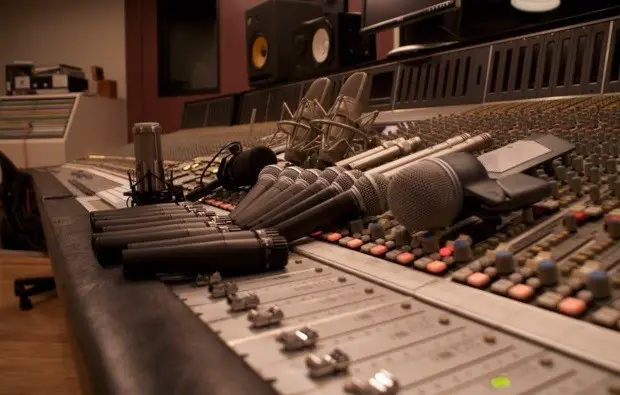 You need a microphone to record vocals and guitar, to get the sound into the computer. The most popular choice is to go in for a condenser mic. These are the most sensitive types of mics so you may need to get a stand as well for it. They do require a power source so your mic preamp or the audio interface needs to have phantom power on it.
You will need good quality microphones for recording, not the built-in microphone on your computer (they are good for chatting on Skype). Eventually, depending on what you want to record, you may have to decide between dynamic, ribbon, and condenser mics – but to begin with, a top-quality, multipurpose mic (like the Shure SM57-LC Cardioid Dynamic Microphone) should be fine for most voice or instrument recordings.
Preamps
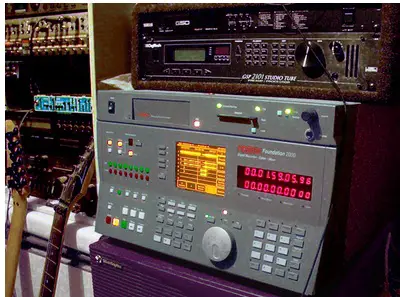 A microphone turns an analog sound into a very minute electrical signal, which needs to be amplified before it can be recorded. That is where a preamp (pre-amplifier) comes into picture. These are required to boost the signals, especially when recording vocals and other acoustic instruments. It helps you get a warm & punchy sound quality from your recording setup. You do have preamps that are part of audio interfaces (for most purposes that should serve you well if the audio interface is of good quality) or it can be bought separately.
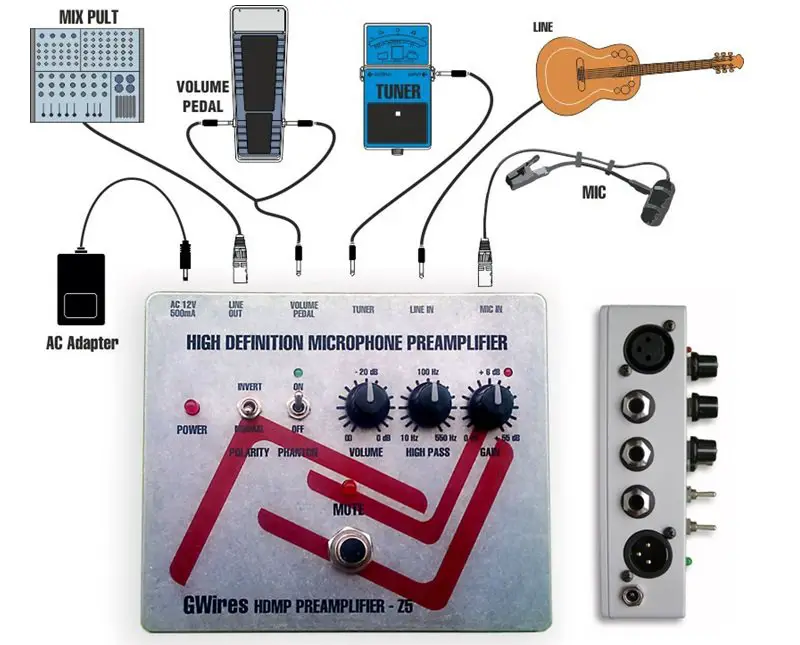
Preamps vs. Channel Strips
A channel strip is basically several components bundled into one device. So you’ll find a preamp, followed by other signal processing tools such as compressor, EQ, and so on.
The obvious advantage of a channel strip is that you have everything in one convenient unit, which also makes it quite portable.
The downside is that you may already have some of the effects, or there could be a better processor form another manufacturer, and so on. So you basically don’t get a choice.
There are several audio interfaces that come with a built-in preamplifier, so why should you consider buying them separately?
It depends on how good you want your vocals and acoustic instruments to sound.
The ones on audio interfaces are good, but you do have the option to buy standalone high-quality preamps that provide you with features such as low impedance settings, DI input, phantom power and polarity invert (lots of features as you can see).
Mixer
 Studio mixers (most are USB mixers) give you more control over the recording process, and does most of the tasks that you would otherwise have to do on the computer. It is easier to turn knobs and use faders on a physical equipment (you will appreciate it more if you have always worked on a software, using the mouse). These can be used to mix and record live, in the studio, and in rehearsal.
Behringer X32 Digital Mixer
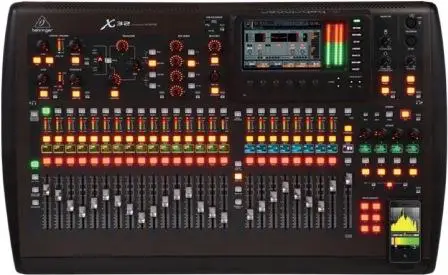 Behringer X32 is an affordable 32-channel board with extremely friendly user interface. Buy Behringer X32 on zZounds
Mackie mixers are commonly used by recording engineers and music producers in recording studios and stage floors. Mackie Mixers deliver high quality audio and has all the features you need to create that pristine mix. Whatever be the application, Mackie has the perfect recording mixer for your need.
Mackie ProFX12 isa gig-ready, professional, compact, and great option for small to mid-size performance venues. Its a 12-channel console with 32-bit onboard effects, six XLR mic preamps, a direct input for guitar or bass, graphic EQ, and USB stereo I/O.
Studio Monitors
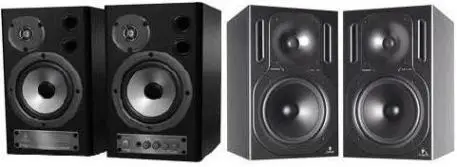
Most hi-fi speakers are designed to make audio material sound as pleasing to the ear as possible. Studio Monitors help you critically listen to your recordings and don’t emphasize or de-emphasize any particular frequencies.
The two main types of studio monitors are active and passive.
Active monitors come with a built-in amplifier while passive monitors have to be powered using separate amps. This therefore makes active monitors more popular compared with the passive types which come with lots of inconveniences.
The fact that active monitors can be connected directly to your mixing board or audio interface means you don’t have to deal with speaker wires and potential problems.
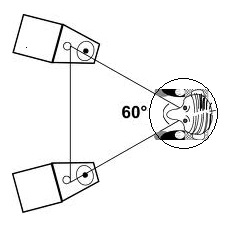
Studio monitors must be placed at the right locations. You need to make sure they are at the Ear level, and since most of them are near-field monitors, they will need to be placed closer to your head.
The best way to do this is to create sort of an “equilateral triangle” between the two speakers and you.
You can buy studio monitor stands to get them at the best possible height.
Yamaha studio monitors: Yamaha’s HS Studio Monitors have earned a solid reputation and backing of musicians and engineers, as one of the most honest, yet affordable monitors in their class.
Yamaha HS5 Powered Studio Monitor: Studio monitor with 5″ cone woofer and 1″ dome tweeter. 54Hz-30kHz frequency response. 70W power amplification. XLR and TRS phone jack inputs accept balanced or unbalanced signals.
Yamaha HS8 Powered Studio Monitor: 8-inch cone woofer, 1-inch dome tweeter. 38Hz – 30kHz frequency response. 120W power amplification. Bundle includes two monitors and cables.
The KRK Rokit Series studio monitors are easily recognized by their unmistakable yellow speaker cones and their impressive price-to-performance ratio, they have taken value-priced monitors to a new performance level. That is one of the reasons why KRK studio monitors are ubiquitous in home project studios.
Rokit studio monitors are known for their front-firing bass port, soft-domed tweeter, glass aramid composite yellow cone, great looks and superb monitoring accuracy.
Another addition to your output setup can be a good set of studio monitoring headphones.
Studio Monitor Stands
Studio Monitors are an important part of most recording setups, but you may need some accessories to get the best out of your speakers. Studio monitor stands help your speakers perform to their full potential.
Monitor stands allow you to raise and tilt your speakers, and you can also make sure that the tweeters are at ear level thus providing you with the optimal listening position.
These accessories effectively transfer energy to the surrounding surfaces, the Bass becomes tighter and the overall imaging is enhanced.
Here are some more benefits you get from using these accessories.
- Flexible Positioning Options: Just move your stand anywhere you like in the room, add to that the height-adjustable option and you have lots of options to find the perfect positioning for your monitors.
- Height adjustment: You get stands that let you adjust the height of the monitors to your liking, make sure you get the ones that are not wobbly.
- Angle adjustment: Though this is not a necessity in your home studio, the ability to adjust the angle of your monitors does give you more flexibility. You can make the monitors face upward or downward.
- Cable Organization: Though cables & cords are a common sight in most studios, you do get monitor stands that provide internal routing so that the cables are concealed; looks neat and professional.
For best results, make sure you get a heavy/dense stand. If the stand has an internal cavity, you may want to fill it with sand for added weight. High-end monitor stands usually have attached monitor isolation pads as well.
Here are the best quality Monitor Stands & Isolation Pads:
Ultimate Support MS-90-45 Speaker Stand
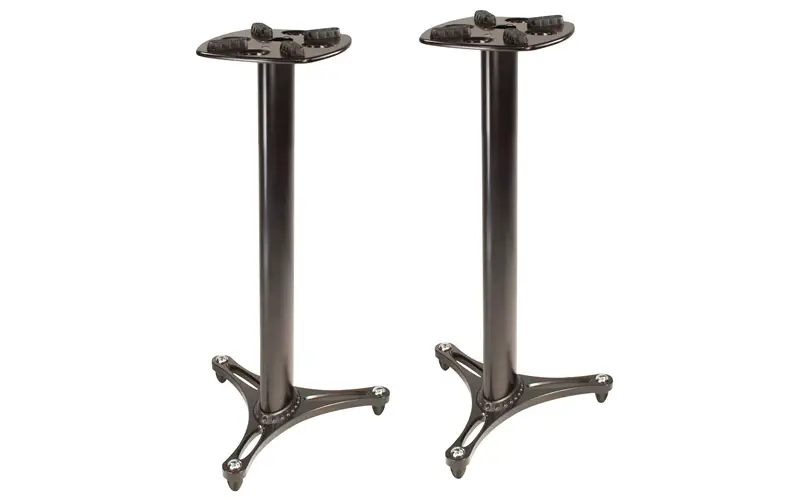 Perfect for any professional or project studio Extremely stable, 4 sound-decoupling pads on top to stabilize and remove unwanted vibrations. The aluminum stand has three internal channels for better cable management. Includes both levelling floor spikes for carpeted areas and rubber feet for hard wood and tile surfaces.
On Stage SMS6000 Studio Monitor Stands Pair
The On Stage SMS6000 stand is height-adjustable from 36 to 54 inches and can support speakers up to 100 lbs. Leveling spikes in the base, steel construction. Allows for the perfect placement of your studio monitors.
MIDI interface
A MIDI interface is a device that allows equipment such as keyboards and sound modules to be connected to each other, but most often connected to a computer.
You may need a separate midi interface for your computer-based recording studio if you have a large number of midi devices to deal with.
Most music producers begin by using the port available on the audio interface or by using the USB midi interface (available on keyboard controller).
However, sooner or later they feel the need for a MIDI interface. Using a MIDI interface, you can connect MIDI keyboards, sound modules, and other MIDI gear to your computer. These interfaces accept standard 5-pin DIN MIDI cables, and convert 5-pin DIN MIDI to standard USB connectors.
These equipment work equally well on Mac or PC.
A MIDI interface provides MIDI In/Out to and from a computer or MIDI-equipped hardware via standard 5-pin MIDI jacks. There are standalone MIDI interfaces, virtually all of which connect to a computer via USB.
Only when you work with a lot of hardware MIDI devices, you will need a MIDI interface (the more gear you have the more ports you need).
1×1, 2×2, 4×4 and 8×8 MIDI interfaces are commonly available.
Cables
Depending on your requirements, you may need various kinds of cables such as 1/4″ Instrument cable, XLR cable, MIDI type cables. These are the more commonly used cables. These are needed to interconnect guitar, keyboard, mics, mixer, and other equipment in the studio.
Guide to various audio cables.
More Recording Equipment
Midi Sound Module
A Midi Sound Module is a synth/tone generator (a piece of hardware) without any playable interface. It gives you access to a huge library of quality sounds. It can take various forms such as rackmount digital model, tabletop synth, groove machine
Sound modules have a collection of built-in sounds. To be able to play those sounds, you need to trigger them using an externally connected device like a keyboard, a controller or a sequencer. All the connections between sound modules, keyboard controllers, and sequencers are made with MIDI.
You will also find instruments known as Drum Modules. A Drum module is a midi sound module that specializes in just percussion sounds.
Sound Sampler
A Sound Sampler lets you record different sounds, which you can then play back based on how the instrument is configured on the sampler. Keyboards and Synthesizers today give you hundreds of sounds to work with, and the ability to tweak them.
What if you want to record some external sound and use it in your recordings? You can do that using a sampler.
A sampler is like a synthesizer except for the fact that it does not generating sounds from scratch. A sampler starts with multiple recordings of different sounds (known as samples) added by the user. The samples can then be played back depending on how the instrument is configured.
A sampler is usually controlled from an external music keyboard, or from an external MIDI source.
Multi Track Recorders
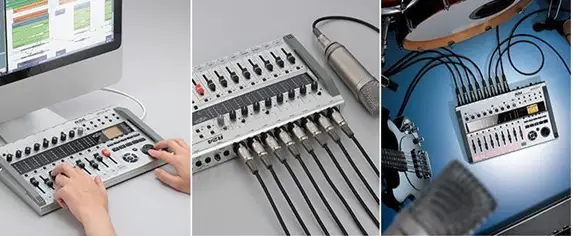 A multi-track recorder (MTR) is a stand-alone equipment with a built-in recorder and mixer which allows you to record all your tracks on it. Depending on the MTR you choose, you get various options to save the data such as on cassette, hard disk, minidisk, or smart media.
Standalone or SIAB (Studio In A Box) recorders may look like a complex instrument to beginners but the fact is that it makes it easier for anyone (including beginners), to get the music recorded with little fuss. And all those controls (knobs/sliders) are actually quite comfortable to use.
Many recording professionals prefer to use MTR which makes it easier to capture inputs from various instruments.
- Some multi-track recorders are designed for simplicity, giving you an easy way to record several channels of audio, which you can mix later in your DAW software.
- Then there are the more advanced types that are more like self-contained recording studios…with built-in effects processing, flexible signal routing, and powerful editing features.
Most recent multitrack recorders feature XLR or 1/4″ inputs, several tracks of playback, onboard effects, drum machine with trigger pads, USB audio interface and surface controller features. Depending on the offer, it might also come bundled with a sequencing software program.
Tascam and Zoom are popular brands that make a range of multi-track recorders.
Tascam is a popular brand that makes a wide-range of studio/recording equipment, and caters to every segment of the sound and music industry. Tascam also makes some of the best multitracking units available, and they have a range of products (including budget ones) under this category.
Power Amplifier
There are several equipment (such as mics, preamps, etc.) that are unable to produce a powerful audio signal on its own that can drive the cones within loudspeakers. High-quality power amplifiers boost weak input signals from such devices to levels that are compatible with speaker systems, without distorting original audio signal waveform. That is why a power amplifier is commonly used to drive a PA system’s passive speakers.
Basic PC based Home Studio with Mixer
You can use this setup for the following:
- For your compositions or for recording a small ensemble, where you record one to two track at a time
- You can use one or two mics at a time (vocals plus acoustic guitar)
- The mixer comes in handy if you are no longer a beginner (in recording)
Once the audio interface is connected to the computer, here are some suggestions for the connections:
- The outs of the Mixer goes to the line-in jacks of the audio interface
- The audio interface’s line-outs can go back to any of the unused line inputs on the Mixer
- The music keyboard’s audio outs goes to the mixer’s line inputs; MIDI goes to the audio interface (you can even use the keyboard controller instead of the synthesizer in case you wish to use sound libraries on your computer)
- Mics go into the XLR mic preamps on the mixer
- Active Monitors go on the mixer’s control room outs
That’s all you need to do to start making music.
Well this is not really a very basic setup because you have a mixer in the setup, and neither is it the cheapest option because you have a Yamaha synthesizer in the setup.
Do You Need Them All? Guidelines!
These are the basic recording equipment that you need (besides your guitars & amps) for setting up your Home Recording Studio. Today with digital technology being the norm in music recording, your greatest expense in setting up a home studio would be a computer or digital multi-track Recorder. This would be the heart of your recording studio as music recording today has shifted to software more than hardware. Almost every aspect of recording takes place in your computer or a digital multi-tracker.
While setting up a studio, you should also consider the acoustics of your room, which means you have to do something to the walls, if you are looking for the perfect setup.
Here are some guidelines (if you’re building your own music studio), and some of it may not apply to you if you are going to record music of any particular genre.
- Choose what you want for your home recording studio, including your working space, and how you’re going to arrange it.
- A fast and powerful computer is a must as the recording software needs lots of processing power to deal with all the tracks and effects.
- If you’re going to record vocals and acoustic instrument, you need quality microphones (variety of microphones, including dynamic, condenser and ribbon microphones). Here’s a good dynamic mic for recording instruments, and an affordable condenser mic for vocals. If you’re going to record only dance music, you may not require it as of yet.
- You’ll also need an audio interface to help you efficiently capture the sounds on to your computer while recording, and improve the overall sound quality.
- Start with some free recording software to get the hang of it. You’ll surely realize its limitation though. So if you’re serious, get an inexpensive recording software program. There are tons of software programs out there including some expensive ones; you may choose to ignore them as of now. Take something that is entry-level; it is really possible to create good stuff even with inexpensive software if you’ve experience.
- Get a pair of quality studio monitors, or headphones meant for studio use to clearly hear your mix so that you can fix them efficiently.
- A MIDI controller keyboard can be handy as it makes it easy to input notes and add effects, which can be recorded in the software. A good one comes with several knobs and sliders (similar to a mixer) to give you total control over the recording software, so you may consider using one in your recording setup.
- As a beginner you may skip the mixer, however, if you spend a lot of time creating music, a mixer can be really helpful as it its much easier to control the various functions using the knobs and sliders rather than use the mouse of the computer. A good mixer comes with quality preamps, built-in effects, low noise design, etc.
- Most musicians/producers also use a FIELD RECORDER (portable hand-held recorder), such as the Zoom H4n portable recorder: a field recorder with five microphones and digital output via USB or SD card, perfect for recording on the cheap, as well as on the go.
Factors to Consider: Acoustics
Here are some factors that you need to consider when setting up a studio at home.
I know that very few of you may have a spare room to convert into a studio, hence depending on what you are aiming to achieve, you may have to take care of a few or probably all of these.
- Space & Budget
- Reverberation
- Acoustic separation
- Frequency balance
The most important thing to do is to make the room as ‘dead’ as possible; it means you basically want the room to absorb the sound instead of reflecting it. This way, you minimize the natural reverb that the room generates.
What sort of materials you can use to achieve this will obviously depend on how much you have to spend!
However, here are a few things that you can do:
- Use thick carpet on the floor; have several furniture items in the room as these help to absorb more frequencies.
- Use acoustic traps that are effective at absorbing sounds, especially in the low and lower-mid range of frequencies.
- Traps are also more effective than using things such as curtains or duvet covers over the walls and windows; those materials are only effective against higher frequencies and not the lower frequencies.
With Practice You Can Sound Far Better
Creating music is also an art, just like playing the piano or the guitar. Being able to produce an excellent sounding mix also needs a lot of practicing; you become better the more you practice.
You really don’t need the most expensive gear to sound great!
You can actually make amazing recordings using a setup that costs a few hundred bucks, but it does take lots of practice to use the equipment correctly and to make great-sounding recordings.
Having the right brands and equipment are necessary, but it will not automatically help you to produce great music. It doesn’t matter what you pay for the equipment, it is of not much use if you don’t know how to use it. It is just not going to happen!
With practice, once you get a hang of how to apply the various effects you will be able to produce some mind-blowing tracks. It is very easy to rival the sound of big-time recording studios right at home, and you have to be thankful to all these music studio software.
It can take years to master the techniques necessary to make pro quality music. So whatever equipment / software you choose you need to become proficient at it. With experience, you will know exactly what you need and how to use them, and whether or not you should go far out of your way to get that dreamy gear.
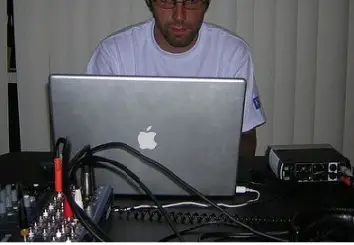
I’m sure you would have ready interviews of several popular songwriters / musicians who have recorded chart-busters right in their bedroom studio.
So learn to use the equipment once you have your music recording setup at home!
An experienced music producer can easily create great music out of any decent recording software. So pick up whatever you can for the budget you have and work on it till you have developed your own style and something that sounds really good.
You can reduce the learning curve by focusing on a single genre rather than trying to cover many music genres. You may need more time to learn (and also need a bigger budget) if you want to create wide across a wide range of genres.
Tips to Save Space in Your Home Studio
There are many who have their recording setup in some corner of their house and if they’re lucky some may have a separate room for their studio. But almost everyone has limited space and would like to have some extra space to accommodate more things.
Here are some useful suggestions that can help you save more space, not all are free though:
- In general, avoid small rooms/spaces if you can. A studio in a bigger room will be able to accommodate more musicians and more gear/instruments over time.
Another important factor is that the room should be naturally quieter. - If possible, remove everything off the floor and also off the walls, especially those things that vibrate
Once these are sorted out, these steps will help you keep your studio more organized.
Buy a Rack
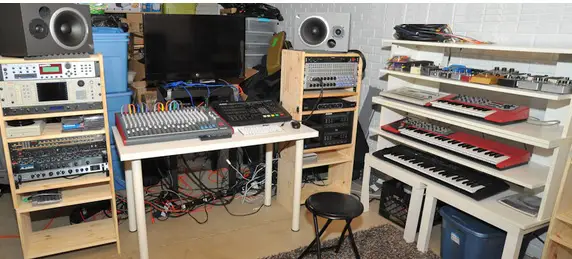
And as much as possible, only buy gear that you can mount in a rack. Professional hardware manufacturers know the importance of rackmounting, so if a certain piece of gear you are looking at was not designed to fit in a rack, that is your first clue to avoid it.
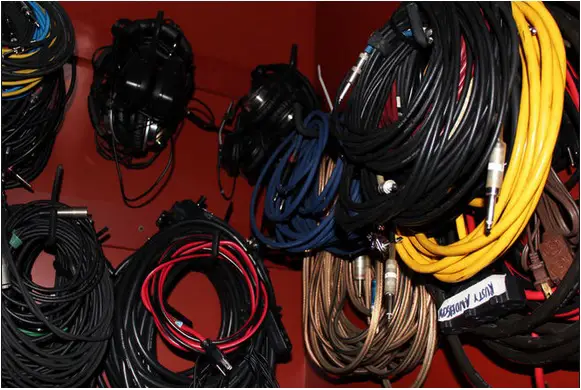
Keep Your Cables Organized
Nothing makes a studio feel cluttered like having cables lying around anywhere and everywhere.
Use cable snakes where you can and condense multiple cables into one. If you don’t have extra money for a snake, and you want to use the cables you have, just buy some tie-wraps and use those instead.
Another good idea is to label your cables using different colors of tape (electrical or masking). Use the same color tape on either end of a cable so that its easier to quickly locate the two ends of a cable; this is particularly useful if a cable is long or is entangled with other cables.
You can also use Velcro ties to keep un-used length of cables together, keeps it nice and tidy.
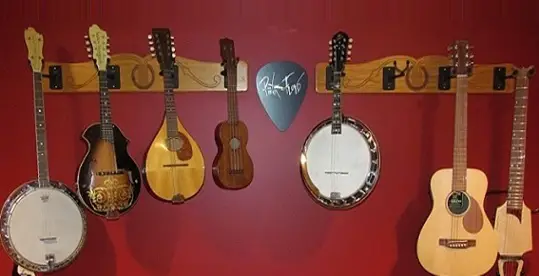
Guitars Go On the Wall
You can always place all your guitars on a guitar stand. But, instead of putting your guitars on a stand where they take up floor space, you can also hang them on a wall mount.
This has the added benefit of possibly helping your acoustics by adding irregular surfaces to the wall for diffusion.
Use a Pedal Board to organize effects pedals
Most guitar players end up owning multiple effects pedals over the years. And it becomes very messy when all those effects (pedals) are spread across on the floor with cables going everywhere.
A pedal board allows you to place all those pedals nicely arranged together.
The supplied case also makes it easy to store all the pedals, in case you wish to store them away, out of site, for some time.
Space Around Your Keyboard
Use the Space Below Your Keyboard: Even if you were to use a piano pedal, you would still have space there to accommodate some gear, so use that space. How about keeping the rack there?
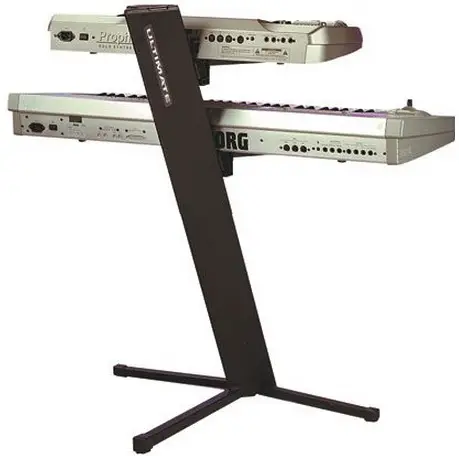
Use Multi-Tier Keyboard Stands: You should also consider using multi-tie keyboard stands wherein you can place multiple keyboards on the same stand.
Check out the best multi-tier keyboard stands here.
Use Multiple Microphones Per Stand
Instead of having a separate stand for each microphone, combine multiple microphones on one stand with an extension arm.
You would think that all microphone booms would be pretty much the same, but this could not be further from the truth.
Anytime you load up multiple mics on the same microphone stand, you run the risk of adding too much weight, and having the stand possibly fall over and damage your expensive mics.
Keep your mics safe and buy a quality stand first of all, but especially make sure you buy a quality boom.
Similarly, you get multi-tiered stands to keep your piano/keyboard and things such as your laptop computer.
Get Rid of Unnecessary Gear
Last but definitely not the least, if you no longer need a piece of gear, or you realize it’s not the product you were originally hoping for, just SELL IT!
I know it hurts to feel like you wasted money by selling a piece of gear that you just bought a few months ago, but it is an even bigger waste of money (and space) to keep it around if you don’t use it.
Keep the gear you need. Get rid of as many redundancies as you can.
Do regular clean up
Over time, dust and trash accumulate; so it’s a good idea to conduct regular clean-up so that things stay clean and organized.
Closing Thoughts
You really may not need all of them right from the beginning. But everyone has to start somewhere and you can always get them one at a time. Probably, the most essential ones are getting a computer, having some software on it and if you can get some good studio monitors, it will help you to produce some music properly.
Useful Links:
Back to home page from Home Recording Studio Equipment
KeytarHQ editorial team includes musicians who write and review products for pianists, keyboardists, guitarists & other musicians. KeytarHQ is the best online resource for information on keyboards, pianos, synths, keytars, guitars and music gear for musicians of all abilities, ages and interests.


Leave a Reply